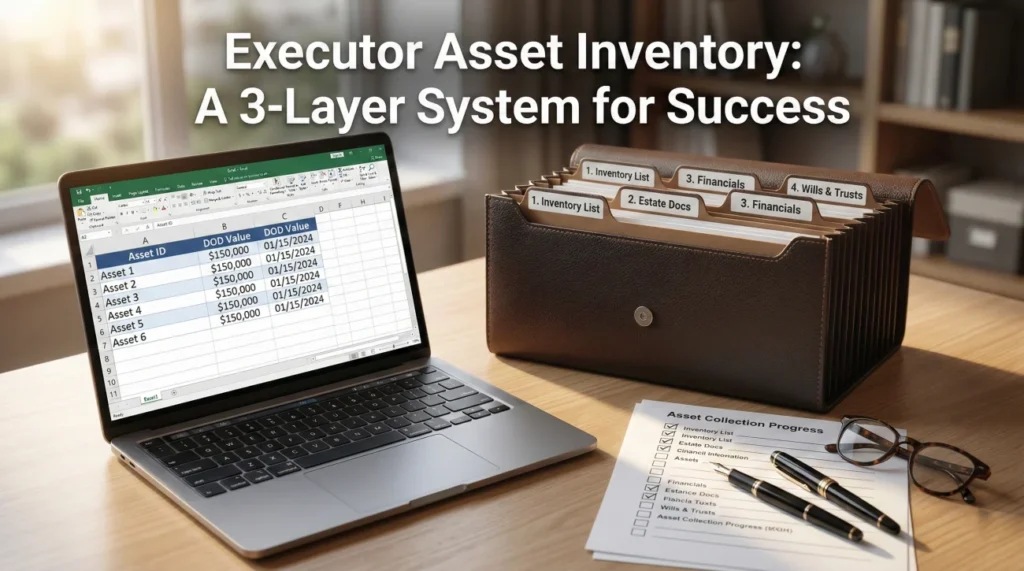
- An executor asset inventory is not just a simple list of accounts; it is a three-part system that connects assets, the documents proving their existence, and the expenses related to managing them.
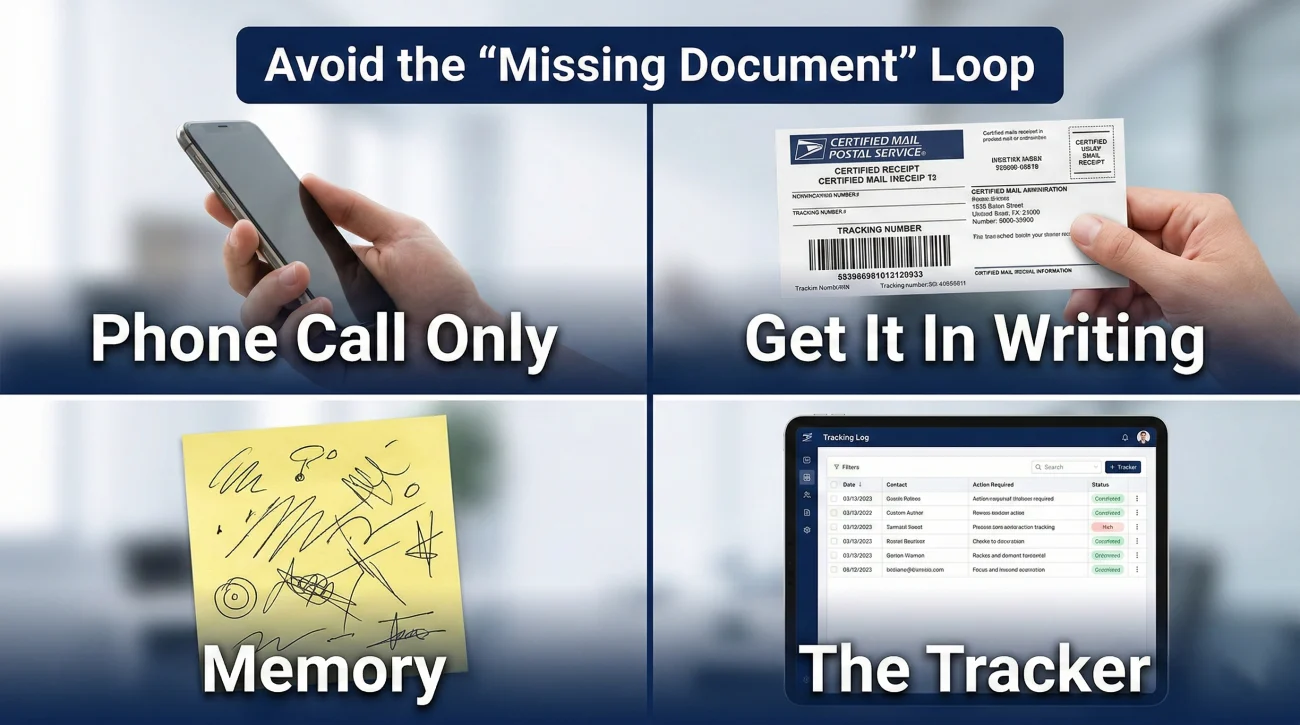
- Without a tracking system, executors often fall into the “missing document loop,” repeatedly asking institutions for the same paperwork.
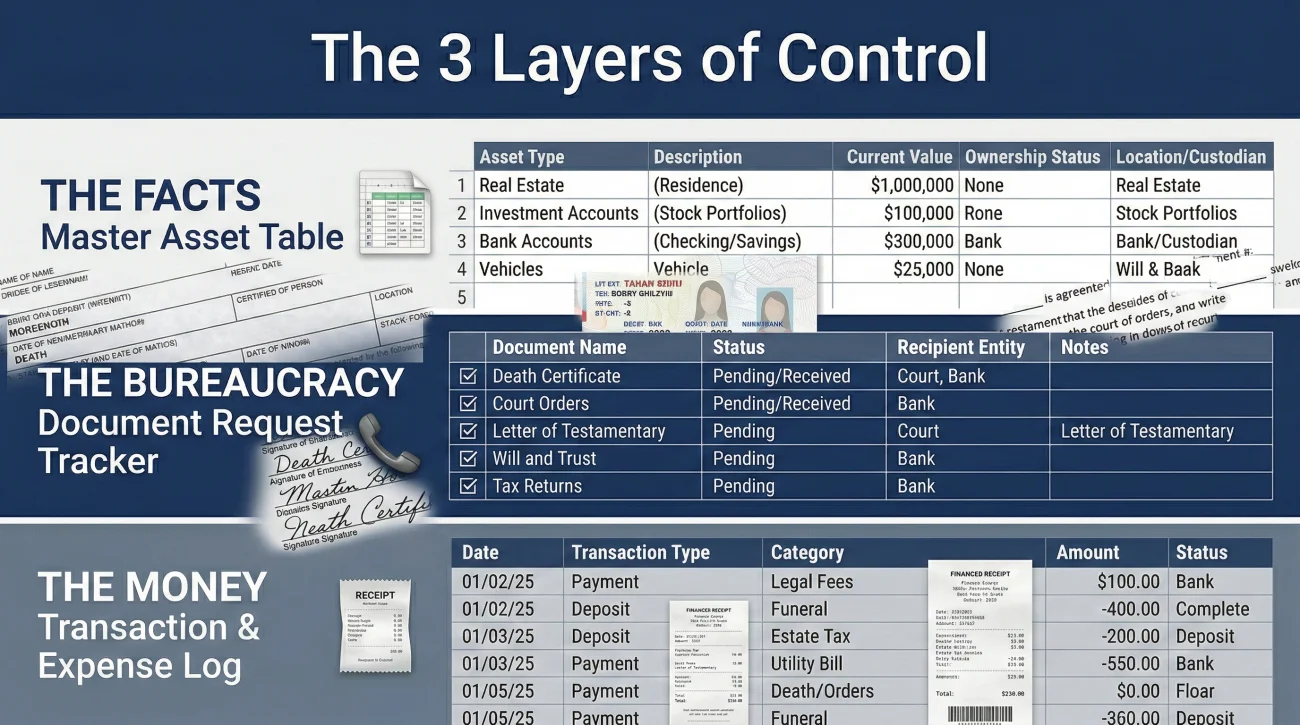
- A robust system relies on three layers: a master asset table, a document request tracker, and an expense log.
- The workflow for every asset follows five stages: Discover, Verify, Document, Value, and Track Status.
- Never rely on verbal confirmations from institutions. Always request requirements in writing and log your communications.
The Invisible Trap of Estate Administration
When I first started helping families navigate estate administration, I noticed a recurring pattern. A stressed executor would sit down at their dining room table, open a cardboard box full of the deceased’s mail, and start writing down account numbers on a legal pad. They believed they were creating an executor asset inventory. But weeks later, that legal pad would be covered in crossed-out numbers, question marks, and sticky notes. They were overwhelmed, institutions were demanding forms they couldn’t find, and the entire process had stalled.
The problem was not a lack of effort. The problem was that a simple list of assets is useless if it is not connected to the underlying proof. In my day-to-day operations, the most critical lesson I share is this: an inventory is not a static document. It is a living system.
In one recent estate I reviewed, there were 11 accounts scattered across 6 different institutions. By using the tracking system I am about to show you, the executor saw immediately that 3 institutions were constantly asking for duplicate documents. Because they had a log of exactly what was sent and when, they were able to push back and get the accounts frozen in 48 hours, saving weeks of repetitive phone calls.
Key Point: Institutions do not care what you know; they only care what you can prove. Your inventory must map every single asset directly to the piece of paper (or digital file) that proves its existence, its value, and its current status.
In this guide, I am going to walk you through the exact system I use to keep estate records bulletproof. We will cover how to build an inventory that connects the assets, the document trails, and the financial records into one cohesive workflow. This is about building a foundation that protects you from liability and stops the endless cycle of missing paperwork.
What This System Covers (And What It Does Not)
Before we dive into the spreadsheets and folders, we need to set clear boundaries. Estate administration is complex, and it is easy to accidentally cross the line from “gathering records” to “interpreting the law.”
| ✅ This Guide Covers | 🚫 This Guide Does Not Cover |
|---|---|
| How to build a master table, track document requests, map evidence to assets, and log expenses to keep your records pristine. | State-specific probate court inventory forms. Every county has different mandatory forms. You will use the system built here to fill out those forms later. |
| Universal habits for file naming, communicating with institutions, and tracking the status of accounts. | Legal conclusions about whether an asset is subject to probate, or tax advice regarding asset valuation. |
The 3 Layers of a Bulletproof Estate Inventory
A functional executor system cannot live on a single sheet of paper. If you try to track the asset details, the phone calls to the bank, and the money spent on death certificates all in one place, the document becomes unreadable. Instead, I separate the administration into three distinct layers. When these three layers talk to each other, you gain complete control over the process.
Layer 1: The Master Asset Inventory Table
This is the core of your operation. The Master Table is the high-level dashboard that lists every physical, financial, and digital item of value. I often tell executors to treat this table like a map of the estate’s universe. You do not put the history of your phone calls here; you only put the absolute facts.
Every row in this table represents one specific asset. To make it functional, it must contain specific columns that answer the core questions an attorney, a court, or a beneficiary might ask.
Essential columns for Layer 1 include:
- Asset ID: A unique number you assign (e.g., A-001, A-002). This is crucial for linking documents later.
- Category: Real Estate, Vehicle, Bank Account, Investment, Personal Property, Digital.
- Institution/Location: Where does this live? (The name of the brokerage, or the physical address of the house).
- Account Number (Last 4 digits): Keep it secure, but identifiable.
- Ownership Type: How was it held? (Individual, Joint, Trust, Beneficiary Named). Note: Only record what the document says; do not guess.
- Date of Death Value: The precise value on the day the person passed away.
- Evidence Link: The exact name of the file in your folder that proves this asset exists.
- Current Status: Discovering, Verifying, Frozen, Liquidated, Distributed.
Layer 2: The Request and Document Tracker
This is where most executors fail. You call an institution, wait on hold for an hour, and an agent tells you to mail in a death certificate. You do it. Three weeks go by, and you hear nothing. You call back, and a different agent says they never received it and you also need a notarized affidavit. You are now stuck in the missing document loop.
Layer 2 is your defense mechanism. It is a separate log dedicated entirely to tracking who you talked to, what they asked for, what you sent, and when you followed up. By keeping this out of the Master Table, you keep your asset list clean while aggressively managing the bureaucracy.
💡 Pro Tip: Whenever an institution tells you what documents they need over the phone, use this exact phrasing before you hang up:
“Thank you for explaining that. Since I am managing a large volume of paperwork for the estate, I need all requirements in writing to ensure I don’t miss anything. Could you please email or mail me the official checklist of required documents and forms?”
If they refuse, you log that refusal in Layer 2. If they comply, you log the date the checklist was received. Every time you send a packet out, you log the tracking number. This level of communication hygiene prevents institutions from moving the goalposts.
Layer 3: The Transaction and Expense Log
From day one, you will start spending money. You might pay out of pocket for extra death certificates, cleaning services for the house, or a probate filing fee. Later, when an estate account is opened, money will flow in and out of that account.
Layer 3 is where you log every single penny. It is completely separate from the Asset Table. Why? Because an asset is a “thing,” while an expense is an “action.” Mixing them creates chaos. When it is time to distribute the estate or reimburse yourself, having a crystal-clear, categorized expense log where every entry is tied to a receipt will save you from accusations of mismanagement. We will look at the exact template for this further down the guide.
The 5-Stage Asset Workflow: From Discovery to Distribution
Now that you have your three layers set up (the spreadsheets or notebooks), how do you actually use them? In my experience, you cannot just look at an asset and consider it “done.” Every single item, whether it is a house, a checking account, or a life insurance policy, must pass through a rigorous five-stage workflow.
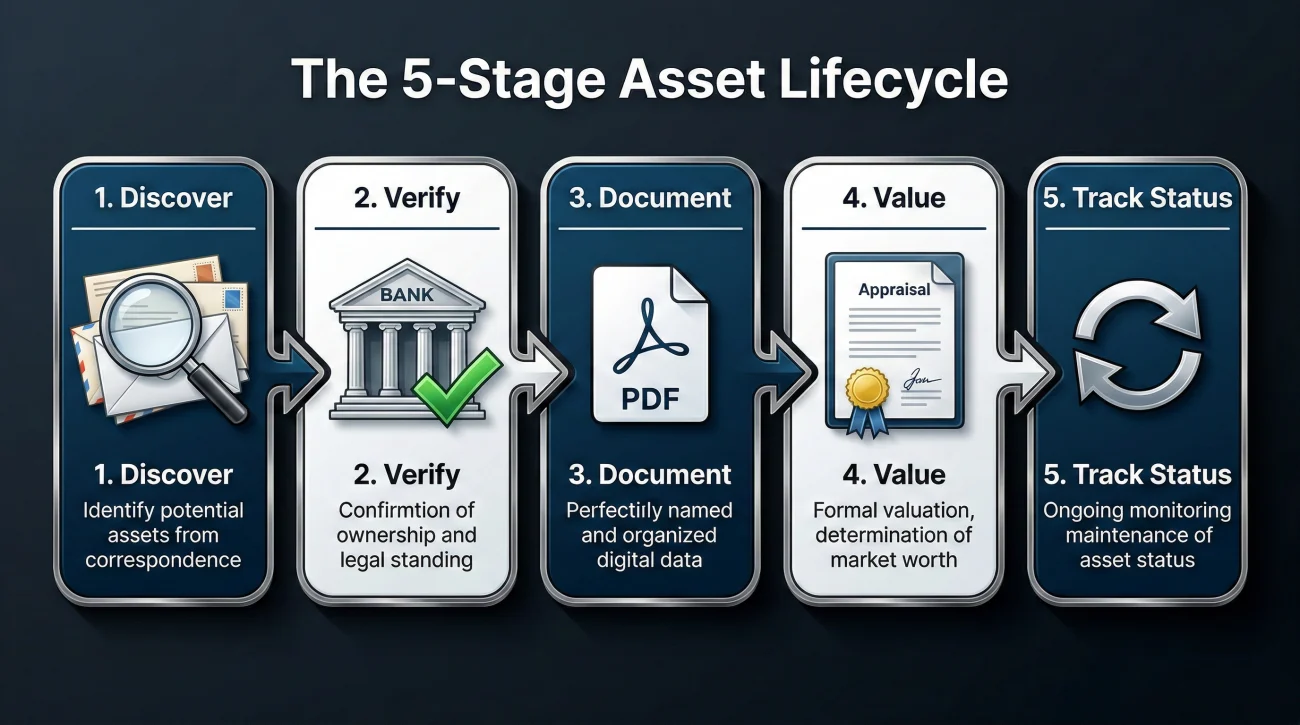
Stage 1: Discover (Building the Candidate List)
This is the detective phase. You are looking for paper trails, digital clues, and institutional connections. You are not trying to access anything yet; you are just gathering evidence of existence.
- The Paper Trail: Check the mail for 3 to 6 months. Look for tax forms (1099s are goldmines), bank statements, and property tax bills.
- The People Trail: Speak with the deceased’s CPA, financial advisor, employer HR department, and close family members.
- The Digital Trail: Look for email receipts for subscriptions or apps on their phone. Additionally, check if the deceased set up official digital legacy tools like a Google Inactive Account Manager or an Apple Legacy Contact, which can legally grant you access to their cloud records without violating terms of service.
During this stage, I always advise executors to search for forgotten funds. A surprising amount of money ends up abandoned. You should always run a search on official state unclaimed property databases. A reliable starting point for this is Unclaimed.org, the official portal of the National Association of Unclaimed Property Administrators (NAUPA). Log any potential matches in your Layer 2 tracker for follow-up.
Stage 2: Verify (Confirming Existence and Ownership)
Just because you found a statement from five years ago does not mean the account still exists or still belongs to the deceased. In Stage 2, you reach out to the institutions to verify the current status.
You will typically need to provide a death certificate and your letters of testamentary (the court document proving you are the executor) just to get them to talk to you. The goal here is to ask: “Does this account still exist, what is the exact balance as of the date of death, and how is the account titled?”
📌 Note: Do not guess ownership. An account might look like it belongs solely to the deceased, but it might have a “Payable on Death” (POD) beneficiary attached. If it does, it usually bypasses the estate entirely. You must verify this in writing.
Stage 3: Document (Capture Proof, Label, and Store)
Once you verify an asset, you must secure the documentation. This is where estates often stall if the evidence is not mapped correctly. You need to build a comprehensive asset inventory document packet.
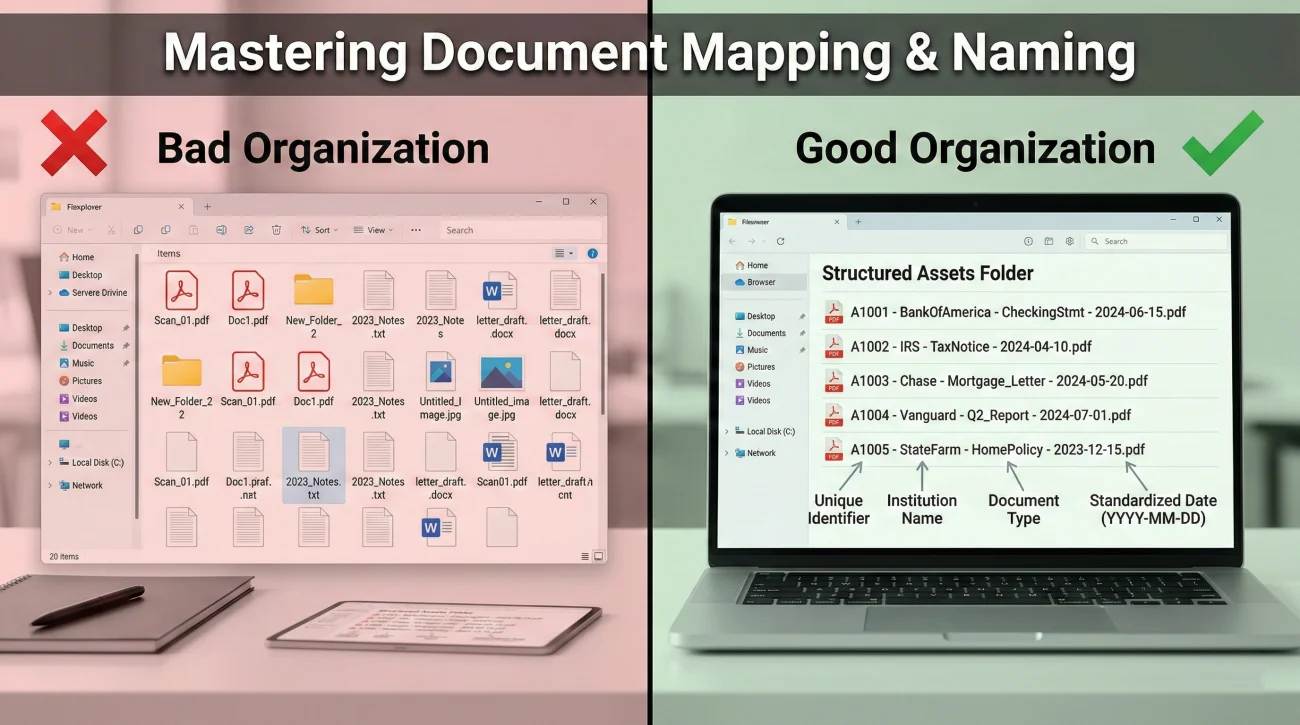
File naming is a critical operational habit. If your computer folder is full of files named “Scan_01.pdf” and “Document_final.pdf”, you will lose your mind when a lawyer asks for the September bank statement. Adopt a strict naming convention.
Statement2023.pdf
[Asset ID] – [Institution] – [Document Type] – [Date].pdf
Example: A-004 – Chase Checking 9988 – Date of Death Statement – Oct-15-2023.pdf
Stage 4: Value (Storing Valuation Evidence)
Every asset needs a value anchored to a specific date, usually the date of death. This is critical for accounting and potential tax reporting.
It is important to understand the difference between self-valuing assets and assets requiring external appraisal. A bank account is self-valuing; the statement provides an exact cash number on the date of death. However, a house, a piece of fine art, or a minority stake in a small business requires an outside appraisal or documented market research (like a real estate comparative market analysis). Your job in Stage 4 is not to give tax advice, but to gather the paperwork that proves the value, name the file correctly, and link it to the Master Table.
Understanding what constitutes an estate and how it is valued is fundamental. For a clear, consumer-friendly definition of what an estate entails, I often refer people to resources like the Consumer Financial Protection Bureau’s definition of a probate estate.
Stage 5: Track Status (The Continuous Loop)
The final stage is ongoing. Assets change states. A house goes from “Pending Sale” to “Liquidated.” A bank account goes from “Frozen” to “Transferred to Estate Account.” You must update the ‘Current Status’ column in your Master Table regularly. This ensures that if anyone asks for an update, you can give them an accurate snapshot of the entire estate in five minutes.
Edge Cases That Derail Executors
Standard bank accounts are straightforward. However, in my experience, there are a few specific assets that will completely disrupt your timeline if you do not know how to handle them.
The Safe Deposit Box
Executors often assume they can just walk into the bank with the deceased’s key and open the safe deposit box. This is rarely the case. A safe deposit box usually requires a specific court order or the presence of a bank officer to open and inventory the contents for the first time. Treat the box itself as an asset on your Master Table, log all communication with the branch manager in your Layer 2 tracker, and do not attempt to force access.
Out-of-State Real Estate
If the deceased lived in California but owned a vacation cabin in Florida, your local probate court authority may not cross state lines. This often triggers a process called “ancillary probate” in the second state. In your Layer 1 Master Table, flag any out-of-state property immediately so you can discuss it with professionals early, preventing massive delays later.
Merged or Bankrupt Financial Institutions
Sometimes you will find an old bank statement, but when you search for the bank, it no longer exists. Banks merge, change names, or fail. Before you assume the money is gone, use the FDIC BankFind Suite. This official government tool allows you to trace what happened to a defunct bank and find out which active institution currently holds its accounts.
Common Failure Modes and The Fix
In my time writing about and supporting estate administration workflows, I see the same traps catch people off guard. Knowing where the landmines are is half the battle.
Failure Mode 1: The “Phone Call Only” Trap
Many executors trust what a customer service representative tells them on the phone and fail to get it in writing. Two weeks later, a different rep asks for totally different documents. Use the Layer 2 Tracker to prevent this: every call must end with an email or a mailed letter confirming the conversation. “Per our phone conversation today at 2 PM, I am sending X, Y, and Z. Please reply to confirm receipt.”
Failure Mode 2: Bypassing Access Protocols
Logging into the deceased’s online banking to “check the balance” or move money using their saved passwords violates terms of service and can severely complicate your legal standing. Always use the official front door by presenting your death certificate and executor credentials.
Failure Mode 3: Disconnected Proof
The executor may have a perfect spreadsheet, but when the attorney asks for proof of the life insurance payout, that’s worth nothing if the documents are buried in an unsorted closet. Every spreadsheet row must include a column that explicitly names the physical folder or digital file where the proof lives.
The System Templates: What to Build
To make this practical, here is how you should structure the columns in your spreadsheets. You can build these in Excel, Google Sheets, or even draw them in a ledger.
Master Asset Inventory Table (Layer 1)
| Asset ID | Category | Institution / Description | Account # (Last 4) | DOD Value | Proof File Name | Status |
|---|---|---|---|---|---|---|
| A-001 | Bank | National Bank Checking | *4567 | $12,450.00 | A-001_Bank_DOD_Statement.pdf | Frozen |
| A-002 | Vehicle | 2018 Honda Accord | VIN ends 9876 | $15,000.00 | A-002_Car_KBB_Value_Oct2023.pdf | Pending Sale |
Request & Document Tracker (Layer 2)
| Date | Institution | Spoke With | Action Taken / Sent | Expected Outcome | Follow Up Date |
|---|---|---|---|---|---|
| 11/02 | National Bank | Sarah (ID: 443) | Mailed certified Death Cert & Letters | Account freeze & balance letter | 11/16 |
Transaction and Expense Log (Layer 3)
| Date | Payee | Purpose | Amount | Paid By | Receipt / Proof Link |
|---|---|---|---|---|---|
| 10/15 | County Clerk | 10 Death Certificates | $150.00 | Out of Pocket (Morgan) | Exp_001_DeathCert_Receipt.pdf |
| 11/05 | Smith Cleaning | House prep for sale | $400.00 | Estate Checking Acc | Exp_002_Cleaning_Invoice.pdf |
Deep Dive Guides for Specific Assets
The system we just built is the foundation. However, handling a house is very different from handling an old cryptocurrency wallet. I have created specific, detailed guides for each type of asset and workflow to help you execute this system flawlessly. Use the table below to find exactly what you need next.
Final Thoughts on Estate Organization
Being an executor is a heavy burden, often undertaken while grieving. The paperwork can feel endless, and the institutions can feel cold and unhelpful. But remember this: confusion is the enemy of progress. By implementing a strict system (separating your asset facts from your communication logs and naming your files clearly), you take away the power of the bureaucracy to slow you down. Build your layers, stick to the workflow, and always get your requirements in writing. You have the tools to handle this methodically.
Sources
- 🔗 Unclaimed.org – The official website of the National Association of Unclaimed Property Administrators (NAUPA), providing a secure, multi-state portal to search for unclaimed funds.
- 🔗 Consumer Financial Protection Bureau (CFPB) – Definition and explanation of what constitutes a probate estate.
- 🔗 FDIC BankFind Suite – The official government tool to locate institutions that have merged, changed names, or closed.
❓ FAQ
🔍 How do I find hidden accounts the deceased didn’t tell anyone about?
Start by reviewing the last 3 to 6 months of bank statements to look for automatic transfers to other institutions. Monitor the physical mail for a year to catch quarterly statements or tax forms like 1099s. Finally, run a search on your state’s official unclaimed property website.
🏦 What should I say to a bank when I first call them?
Keep it simple and factual: “Hello, I am the executor for the estate of [Name], who recently passed away. I am calling to report the death and request a written checklist of the documents you require to freeze the account and provide the Date of Death balance.”
📄 What documents do I need to prove an asset exists?
Usually, the most recent official statement is sufficient for discovery. For real estate, a deed or recent property tax bill. For vehicles, the title and registration. Always scan and save these documents with clear file names linked to your inventory spreadsheet.
⏱️ How do I follow up when a financial institution ignores me?
If phone calls fail, switch entirely to writing. Send a formal letter via certified mail with tracking. In the letter, reference previous calls (dates and representative names if you have them from your tracker) and request a status update within a specific timeframe.
✉️ How do I confirm they received the death certificate?
When sending sensitive documents, always use certified mail with a return receipt requested. Once the tracking shows delivered, wait 3 to 5 days, then call to ask: “I see my packet was delivered on Tuesday. I am calling to confirm it has been uploaded to the estate file and ask what the next step is.”
💻 Can I just log into their online banking to get the inventory numbers?
No. Using a deceased person’s passwords violates the bank’s terms of service and can trigger fraud alerts, locking the account permanently. Even if you are the executor, you must notify the bank officially and wait for them to provide the Date of Death balance.
📂 Where should I store all these estate records?
Use a dedicated, secure system. If using paper, get a fireproof lockbox and use separate folders for Assets, Debts, and Estate Expenses. If digital, use a secure cloud storage folder with a strict file naming convention. Do not mix estate records with your personal files.
📅 What is a Date of Death (DOD) value and why does it matter?
The DOD value is the exact worth of an asset on the day the person passed away. It is crucial because the probate court and tax authorities use this specific number to determine the total size of the estate, not the value from a month before or after.
📝 How do I handle expenses I paid out of my own pocket?
Log them immediately in your Layer 3 Transaction and Expense log. Record the date, amount, purpose, and save a digital copy of the receipt. You will use this exact log to request reimbursement from the estate account once it is officially opened and funded.
🛑 What is the biggest mistake executors make with inventory?
Relying on memory and sticky notes. The biggest mistake is failing to write down who they spoke to at a bank and exactly what was requested. Building the three-layer system (Asset Table, Request Tracker, Expense Log) from day one solves this problem entirely.
⚠️ Disclosure: I'm not an attorney and nothing on this site is legal or tax advice. The content covers process, organization, and workflow—the operational side of estate administration. For legal interpretation, jurisdiction-specific deadlines, contested situations, or tax matters, please work with a licensed professional in your state.